


One of the favorite 3D printers in Hungary is the Creality Ender 3, with which you can print almost anything.
4-5 years ago, owning a 3D printer was still a curiosity. It was so special that I had an acquaintance who was planning to start a business with his newly purchased printer. Then the prices started to fall at lightning speed, so 3 years ago you could get usable pieces for barely a hundred thousand, and the entry level could be yours for 70-80 thousand.
Of course, we are just smiling at the entrance level at that time, because the development is crazy, so nowadays we can get a machine for 60-70 thousand forints, which would have been among the pros a few years ago. Today I present you with one.
The 3D printer has been on my boot list for quite some time, but for a very long time I didn’t dare cut into the project. The reason for this was (now in the past tense) that I burned myself properly with a Chinese engraver. Of course not literally.

What happened was that for a lot of money I bought a home-assembled structure that could do normal milling / engraving, but they also added a laser unit, so it could or would have been used for laser engraving. And I didn’t accidentally write this in conditional mode.
The problems started with the assembly. The description provided with the machine is incorrect. There were not those parts in the box as in the description, there were screws of different sizes than in the manual, and in some places the assembly also differed. It took me 4 hours to put it together based on YouTube videos, and my Calvary isn’t over here yet.
After installation, the added software kept freezing. This was a problem, as it turned out later, because it was possible to change the sign of movement on the Z, X, and Y axes. Eventually I found a working program, but I wanted to mill it to reflect everything, and that was really a problem with the Z, that is, the vertical direction, because the knife died into the slide as well.
And the problems are not over here. I was able to reverse the directions manually, and finally the first engraving was born with great difficulty. It took me 2 days.
Then I thought I would try the laser. It was a complete bankruptcy. He flashed once at the start of work, then went out forever. I gave up…

And why did I tell you that? Because I want you to understand why I didn’t dare to afford a DIY 3D printer. I was afraid of assembling, I was afraid of the software, but most of all, of throwing a lot of money out the window again.
It didn't happen that way!
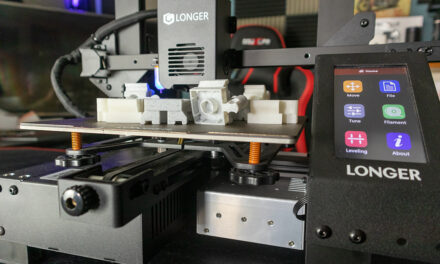
After a lot of online research, a lot of checking and reading, I felt like I had found the budget category machine I needed. This became the subject of today's test, the Creality Ender-3 3D printer.
The machine comes to us in a rather large and heavy cardboard box. the weight of the machine is 6,9, the weight of the package is 8,9 kilograms. Inside the foam bed are the components, of which, despite not having much to make the structure DIY, that is, we need to assemble. By number, we can weave it together from exactly 13 pieces, not counting, of course, screw bags, Allen keys and the like.

Fortunately, the biggest piece, the slide, the motor that drives it, most of the electronics are already put together, we don’t have to deal with that.
Surprisingly, not only do we get everything for assembly, but the package also includes a pliers to make the printer thread, or as the pros say, for cutting the filament.

The parts are packaged in such a way that nothing can be damaged even accidentally. The screws are packaged separately as our variety, each with a size designation and nowhere a Chinese punctuation mark, all in English. Actually, all my fears were gone at the unpacking, everything seemed like a blood professional.

I think I’m blessed with a good dose of technical veins, and not only on a theoretical level, I also assemble everything that gets my hands on it. That's why the engraving machine was surprising anno, which I had a hard time coping with.

However, Creality Ender-3 is a completely different world. I was surprised to find that the assembly guide contained only 12 steps, and at first glance these did not seem complicated either.

As a first step, the vertical columns (4 screws) must be screwed onto the incoming part, a microswitch (limit switch) goes with two screws, and the motor that moves the print head in a vertical direction with two more screws. Two screws hold the power supply, two more hold the printer display, and we’re past the first 4 steps.

The next six steps show how to assemble the head moving part of the X vector. Place the head carriage on the rail, screw the motor on one side (2 bolts), a roller on the other side to tension the ribbed belt (2 bolts), then put the ribbed belt on and it is done. The last step out of these six is to put the latter assembled part in place.

Then all you have to do is screw on the top cross member (4 screws), put the stand holding the filamnet drum (2 screws), plug the cables in place, and we’re done.
Write and say, the whole operation was not half an hour with unpacking. If we could say something that was a pleasant surprise, it was, really!

When we are done with this, the next very important step is to level the tray. I did this the following way (you can be sure otherwise, I didn’t look for it, it worked for me). The tray can be adjusted with four large rollers. There is a spring on the shaft of these, on these springs the whole stuff sits, on which the printer collects the works to be printed, so it is important that it is horizontal.

So I did this:
I grabbed the spatula (like a spatula) that is given to pull the finished works off the tray. I pushed the tray so that the print head was in the corner tab, then I used the metal part of the spatula as a spacer to wrap the wheel under the corner until I could gently pull the metal plate out of the tray and head. I repeated this with the next three corners, then went around once more and checked to see if the distance was the same everywhere.

That was it, it took a long time compared to assembling, I messed with it for about 10 minutes, but in return my new 3D printer was up and running in about 45 minutes. I was able to start getting acquainted with the software.
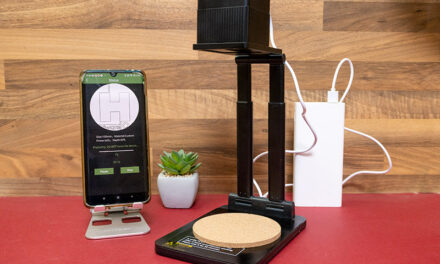
The machine comes with a program called Creality Slicer, which can also be found on the flash drive included in the package. Unfortunately, he can't speak Hungarian, but he can speak German, English, Polish, and a lot of other languages. Fortunately, its use is so simple that you don’t need a dictionary for anyone who doesn’t speak any of the languages.

The installation is normal, the wizard guides you through it, we click ok. Once the program is in place, you need to specify the machine type and the material you are printing to in the settings.
You will then need to connect the machine to your computer via USB (USB cable not included) if you want to print from the machine. If you don’t want to do that, you can also print from a memory card, it’s one degree simpler, but more practical from a machine, because you can set up a lot of everything.
So, if we stayed at the computer, we need to specify in the settings what proton the machine is communicating with the printer, and that’s done too!
Here I note that the document included with the program (on the flash drive), with such detail and images, leads us through everything that art gets stuck.

The program itself, at least on a basic level, is as simple as a slap, and as I’ve seen so far, if we’re not very warped, the basic level will be enough for everything.
We can load the model to be printed, we can rotate, we can resize it, we can even place more things on the tray, we won’t need anything else. We can move the print head and under the tray, if we feel that the head is too far from the tray, we can adjust it in 10-1 and 0,1 millimeter increments.

If you have it, the program calculates who writes out how much material you will need (in meters and grams) and you can also see how long it will take to print if the port setting was good, the printer is together connected to the machine, the printer's power supply is turned on, then we tap on the monitor pictogram representing the computer in the program, and the printing can start!

Before you start anything, you need to load the printer thread into the machine. They add a little to the package, but that will only be enough for trying, I managed to create a tiny owl and a mini maze, and now I’m sitting on needles waiting for the roll I ordered because I’m full of ideas for what else I should print. For example, Christmas tree decorations.

Well, I turned. So, the printer thread is not complicated to load either. The car, which also includes a head, has something that looks like a gear, with a hole lined with copper (bronze?) In front of it. This is where the wire needs to be pushed in, the spring assembly compressed by hand so that the wire goes into the side of the gear and then into the tube, which brings it to the head. The thread should be pushed into the tube until it gets stuck, at which point it reaches the head.

Okay, that's it. Cables in place, power on, printer thread plugged in, checklist checked,
When we send the model to be printed from the machine, the tray heats up the tray first, it should be 60 degrees, then it starts heating the print head, it will be 200 degrees. If the temperatures are present, printing will start.
I didn’t mention it above, but it’s important to also set the print quality in the software. The layer thickness can be coarse, medium and fine, in the latter the machine works with layers of a tenth of a millimeter. The end result will be very frank, but it will take the longest.
I turned again. So when we start, we get a sole under each model, it will stand on it while the printing lasts, once it is done, it can be cut smoothly with a scalpel.

During printing, we have nothing to do, making larger objects takes many hours of operation, and if the machine is in a place that does not bother us, it is worth postponing it overnight. When printing is complete, everything stops, and the head and tray cool down, and we can pull our work off the tray.
We have gone beyond the practical part, let's take a closer look at the Creality Ender-3 printer! I have already written above that the finest printing has a layer thickness of 0,1 millimeters. The maximum printable object size can be 220 x 220 x 250 millimeters, which means it is quite large.
Of course, you can also print larger things, for example, there is a flute in the models that come with the machine, which the machine prints in four pieces, then you have to fit the parts together.

In theory, multi-color printing is also possible, but it can only work with one color at a time. Machines that can use multiple colors at once are not just an order of magnitude more expensive. The material emitted by the head is 0,4 millimeters thick, the maximum print speed is 180 millimeters per second, but the speed depends largely on the quality, the size of the object, so we can count on 30-60 millimeters as the maximum speed.
We can use the most common materials as printing thread, it can be PLA, ABS or TPU. Buy 1,75 millimeters of thread for the machine!

Of course, you can get everything you will need for operation, such as a printer thread in several colors, a nozzle for the print head (a spare part is included in the package), and usually all parts are available.

In addition to its own, it supports several programs, such as Cura, Repetier-Host, and Simplify3D, and several file formats, such as STL, OBJ, and AMF.

As I mentioned, you can print from a computer, but even from a memory card, and the machine's display provides enough information for the latter. As an extra, it can also resume interrupted printing, so, for example, in the event of a power failure, the semi-finished product does not go to the trash, the machine resumes where the work is interrupted.

What I also like is that there are plenty of accessories on the net for the printer itself. Well, they are not what we need to buy, but ones that we can print out. For example, there is a thread guide, a tool tray, and you can even print a box behind the display, which hides the printed circuit board.

As I wrote above, I’m already sitting on needles waiting for the first roll of printer thread to arrive, because the 15 grams of material that came with the machine is just enough to make us feel like printing.
The Creality Ender 3 is perhaps the best machine in the under $ 200 category. If set correctly, you get almost flawless print quality.
Most people cite setting the tray as a negative, but as I wrote above, I found a simple and well-functioning solution to this. I note that adjusting the tray is really important and an unavoidable operation because in the wrong case the print head can damage the coating of the tray, in less bad case only the prints will not be beautiful. Either way, this must be done accurately and attentively.

Creality Ender-3 did not disappoint. It’s no coincidence one, if not the most popular 3D printer at home, as the price is surprisingly low and the print quality, not just great for the price.
If you wanted to surprise yourself or anyone in the family with a 3D printer, look no further, you'll love this!
As always, I give a coupon now (coupon code: BGe3fa62), with which you can order from a Czech warehouse, with a short delivery time, without customs duties and VAT, together with the delivery fee and package insurance for only HUF 53. Click on the link below to purchase:
Evaluation The Creality Ender 3 3D printer has passed the mark. It’s one of the best pieces in the sub-$ 200 category, easy to assemble, easy to set up, and printing is a breeze with it. If you are buying a 3D printer, this is definitely the recommended category!


