


Experience your creativity, create super things!
I am such a creative type. Or so I think. I draw, I design websites, logos, corporate identity, let’s say these are most familiar and for my part. As you may have noticed, I write not only tests, sometimes custom-made articles on all sorts of topics, but also thousands of topics.

I would constantly create something, that’s what my brain always goes through, and sometimes I don’t even regret spending money to make my plans happen. That's what happened last year when I bought a more serious laser engraving machine. I also wrote a test about it, which I ended with a whiff of what super things, toys I’m going to make for my sons, and what super Christmas tree decorations for my couple.
Well, I didn't make either. I ran out of patience and free time to spend on it and couldn’t cut to a quality that would have been acceptable to me.

This spring, however, I cut into the matter again, I began to read more seriously what technique I could use to ensure that the cut material did not burn, the cutting edges were beautiful, precise, blade-sharp. I also found a solution, but it cost money again.
That, of course, doesn’t stop me from doing anything, I’m always with the thing of hitting more birds with one stone. I can create beautiful things and write you an article about it. So we're all fine!

So in this article, I’m going to show you what it takes to get a truly professional laser cut!
But before we get into that, read my article on engraving that I bought last year, and also watch the video tutorial in the article here:
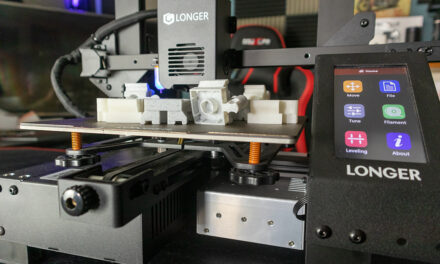
Ortur Laser Master 2 Pro - Ben Kenobi turns yellow with envy
If you are a little interested in the subject, you know that with a good engraver you can not only engrave pictures and captions in different materials, but also cut them. Whether the material will be cut or engraved depends on how you set up the machine.

If we want to cut, we increase the strength of the laser and reduce the speed of the carriage moving the laser. If we engrave exactly the opposite, increase the speed, reduce the power of the laser.
Of course, although the laser is strong enough in these structures, it is not so much as to cut through, say, a sheet of steel, so the hardness of the material determines that we can only engrave or cut. The former statement about strength and speed obviously applies to materials that we can cut through.

If we are cutting or engraving, we have another setting option, and that is the number of turns. A thread means that the laser beam travels the marked path once, but you can set up to tens of threads if the workpiece requires it.
When cutting is done other than by engraving, we burn the material. How much we burn depends on the strength of the laser. If you want relatively nice cutting edges, you can try to make the laser stronger and slow down the car so that the cut is done in one go. Or, we can try setting up more threads next to a weaker laser.

These two methods can be considered, but neither is really perfect. They are not, because in addition to the cutting edge, if the hell you eat it, the material will burn. Let’s say plywood is the one I use most often. But not only does the material burn on the surface, but also below, where it rests on the surface on which I fix the material to be cut.
The solution to the latter problem can be to lift the material to be cut from the surface below, say, placing small bucks under the corners of the plate. However, the material will still be burnt at the top. And that's just one problem!

The other problem, and I claim it is no less serious, is that combustion products are produced during combustion. In Hungarian, it smokes like rosseb. No matter what we cut, if plastic, if plywood, substances are released that are not useful to inhale. And you know, the more the laser burns the material, the bigger the smoke.
In the end, you realize that you are going to cut with a laser either on the patio of the apartment or in the yard of your house, because otherwise, like the fussy cat, the woman will cut out of the apartment!
What is not a special problem anyway is the engraving. You don't need any extra equipment for this, at most it can be a problem if you want to make the pattern to be engraved more plastic and burn it deeper into the material. In this case, of course, smoking is inevitable.

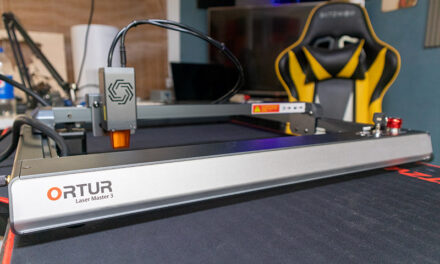
Cutting with Air Assist. It was as if I had drawn the lines with Rotring, even though this is already the cut sheet!

Well, perhaps so far it has become clear that a solution must be found for both the lower and upper halves of the material so that the laser does not burn here or there. Let's start with the simpler thing, the bottom page!

I wrote above that the solution to avoid burning is to lift the material to be cut, in which case less heat will accumulate on the underside, the burning will not be rough. However, this solution is not perfect either, because the workpiece (due to its weight, for example) needs to have a normal support and not move during cutting. So, you will still have to lay it down on some stable surface.

For this, honeycomb-patterned washers were invented. These are simple structures, consisting of an aluminum frame, an aluminum plate bent into a honeycomb profile in the frame, and they are usually used to fasten the workpiece to the washer.

We even get an aluminum plate for this structure that we can place under the washer, protecting our table top from laser damage.
Fortunately, such washers are available in many sizes, so we can find the right size for any size machine. For me, the 2 x 450 size was right for the Ortur Laser Master 430.

To burn the top of the material without burning, we will need a more serious thing, a new laser unit. Unfortunately, this was a pocket-sized story for me, because when I bought the machine last year, this unit was not yet available. If you buy an Ortur Laser Master 2 now, you can buy it right away with this new laser, saving you approx. 35-40 thousand forints.
First of all, let's name the child, you can find the new laser module called LU2-4-LF, or if you might want to buy a Laser Master 2 Pro at the link at the end of this article, buy what you add to this head!

The manufacturer highlights four important differences from its predecessor, these are:

This is necessary to ensure that the focus is appropriate at the top and bottom of the material (or as close as possible to the most optimal).
The longer the depth of field, the easier it is to adjust the focus and cut thicker materials. If you adjust the distance to the head, you can safely adjust the focus to the surface with a 3-4 mm plywood, the cut will still be right.


Well, let’s start there, installing a new laser unit or installing an Air Assist isn’t a complicated thing. Maybe one thing you need to pay attention to is that you can only use this head for 24-volt engraving machines. Unnecessary to buy machines other than this, it will not work with them!
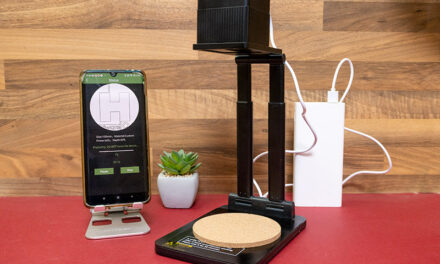
For the Air Assist to work, you will also need a compressor that pumps air to the laser head and the workpiece surface. This can also be purchased, I now used a plain battery car pump for the duration of the test. This is enough for smaller jobs, but you should get a normal compressor for a longer period of time! I will add a link to this at the end of the article to see if anyone is interested in the complete package!

This image shows the difference between the cutting quality of Air Assist on and off. The beautiful hairline cut at the top right, the burnt-edge cut at the bottom right and left.
So the point is:
Using Air Assist has yielded amazingly good results, although I note the new head itself has worked incomparably better than the previous one. I was able to cut through the plywood in one go without Air Assist, burning the material relatively thinly, and this was strongly felt in the amount of smoke generated.
The lower part of the working material was essentially left without burning, but the discoloration of the honeycomb-shaped aluminum plates showed that combustion products are generated here as well!
When I turned on the compressor, I noticed a change that was quite amazing. The edges that had burned so far were completely gone, the cut on the plywood was pretty much like drawing a thin line with a zero-five graphite pencil.

I will honestly say, at first I thought I had set the laser power wrong and I expected that when I took the workpiece off the table, it would turn out that the laser had not cut through it.
Instead, the cut was perfect, the cut pieces popping out of the plate. The fact that I still laser cut only the cut edge of the plywood was indicated by discoloration on the side of the cut material. The surface of the plate was intact at both the bottom and top.

Where cutting failed first, the quality of the plywood was a problem, everyone should pay attention to it. Where there is only glue between the layers instead of the wood board, for example, the set force of the laser, which cuts the wood smoothly, will not hold the glue. So you should buy the disc from a place where the quality is good. Even I am looking for the perfect manufacturer.
It is also very important to be able to save a lot of time by cutting the material in one go. And a lot of you understand that a mammoth in the picture will take days to work faster. If you cut the old way, you will be better off with a weaker laser due to less burning, which will take you through the material in 2-3 turns.
If it took me 2 days to cut in one run, you can easily calculate it would have taken 4 days by two runs 6- three runs by the time I was done. This is a significant difference.
Of course, I also engraved the new head. I tried several methods, you mean, I took the picture in several ways, which I then engraved. I got amazing quality in every case, even if I made a slightly stronger, more plastic surface, even if I experimented with finer shades.

And, more importantly, I shouldn’t miss the fact that smoking on the workpiece was almost completely eliminated with the use of Air Assist. It's a big word, a big light. In practice, this meant that I was able to work almost odorless (but not completely odorless) in an enclosed space with an air purifier next to the machine, so that I was able to stay in the room and write my current article.
Making the mammoth shown in the article was a roughly two-day job. Although not visible on it, the amount of material in it is close to a full board, which is 1,5 x 1,5 meters. So I cut a lot, it didn't take two minutes to make the cut, but the end result was perfect. Sure, the next 3D puzzle I looked at will be done in a smaller size because it got so brutally big.

I also took the engraved “pictures” shown in the article with the new head, I took the different parts of the original picture taken in the smaller two runs to make the final result more nuanced. The larger image required three runs, again due to the shading, and I tried to make the end result a little more plastic by “engraving” the sharper lines.
I feel that it’s also worth choosing the new head because of the quality of the engraving, and even if you want to cut, there’s no question that you will need Air Assist as well.
In order to achieve the above, you have to reach into your wallet and spend about $ 260, which is about 100 forints at the current exchange rate. Of course, this is only true if you already have a Laser Master 2 Pro on your desktop at home.

If you don't have a plane, you'll spend more, but as I wrote above, you can buy the plane right away with the new head and Air Assist, so you'll only have to pay 40 less than me.
Here at the end of the article I will add a link to everything, if I will, I will also add a coupon code. You'll also find a link to the engraving machine, the new laser unit, the honeycomb-shaped washer, and a compressor.
If you love to create, it is guaranteed to be a great pleasure to get such a package!

